Integrate a Third-party CMS System With Adobe Commerce Cloud
The requirements of each e-commerce system integration are always unique and even sometimes quite exotic.
In the commerce unit here at comwrap Reply, we work mostly with Adobe Commerce Cloud, which also adds some further requirements on server architecture. In this article, I will share our experiences and show you how you can integrate another Content Management System, CMS — for example, Wordpress — with Adobe Commerce Cloud covered by single domain name.
Requirements
We have the following requirements:
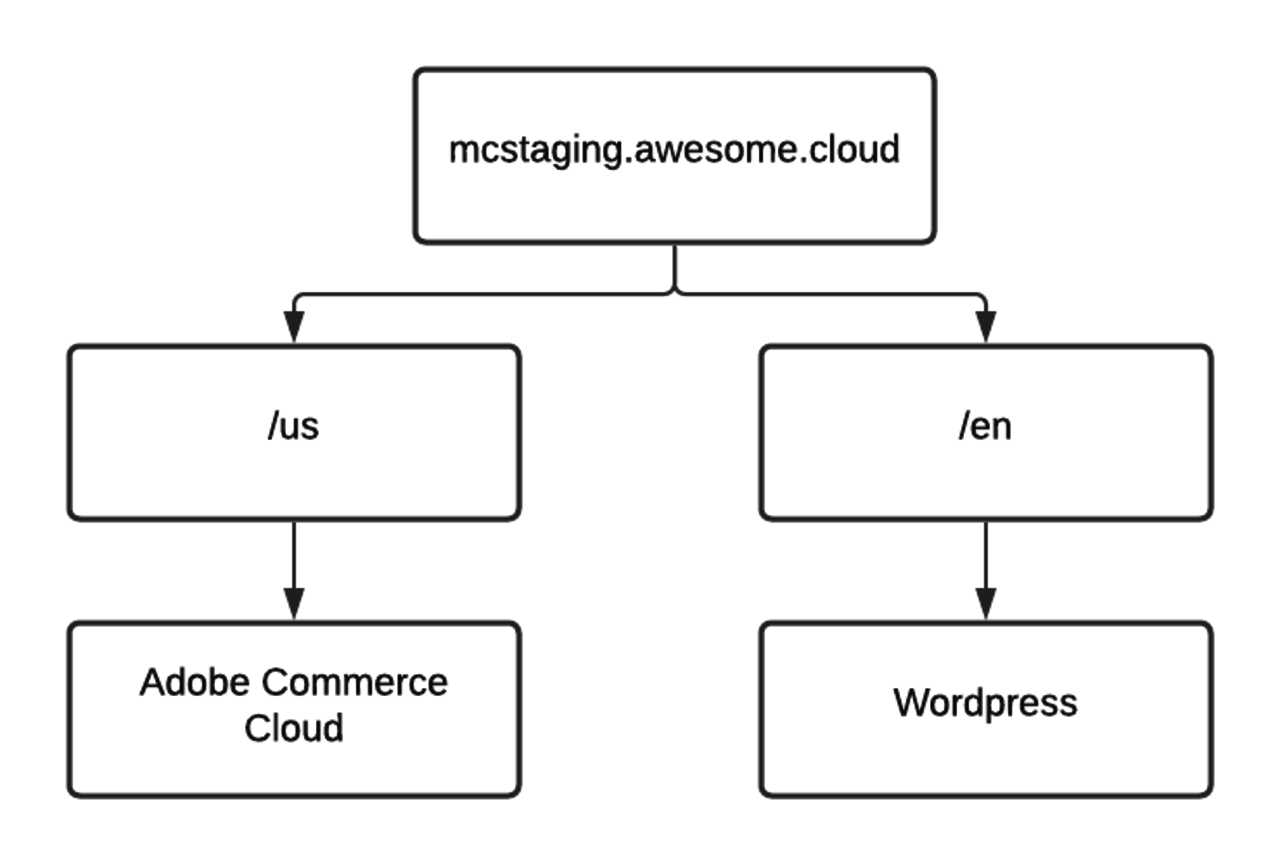
Adobe Commerce Cloud system will work by using the following URL:
At the same time we need to make sure that access to the old Wordpress system is still available via mcstaging.awesome.cloud/en
Problem
As you can see, the main problem here is that same URL will be used for two different systems. And, if we are talking about an on-premise solution, it is not a problem to just install both systems on the same server. However, this is not possible with a Cloud solution, where a Commerce system is installed on Server A and a CMS is installed on Server B. This challenge is not achievable with standard DNS settings, because you can only assign one domain per one IP as standard.
So our requirements look like this:
Solution
An advantage of using Adobe Commerce Cloud is Fastly CDN (Content Delivery Network) integration, which manages the FPC (Full Page Cache) of Magento and also manages all traffic coming through the cloud server.
This leads us to the idea that we can manage traffic to different sources by using Fastly configuration.
Fastly configuration
First of all, we need to define a new backend system for Fastly service. (You can read more about backends here.)
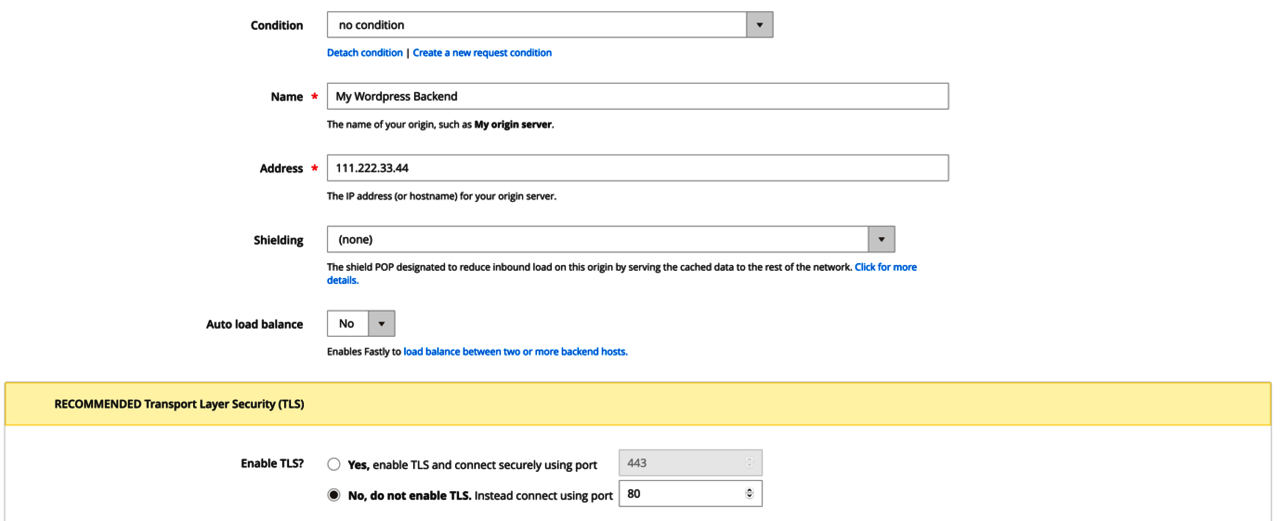
Go to Magento Admin, then choose Stores → Configuration → Advanced → System → Full Page Cache → Fastly configuration → Backend Settings → Create new Backend and define the IP of your CMS installation in the 'Address’ field.
Example: 111.222.33.44
After, fill in all other settings. I’ve included a screenshot of what you should see below.
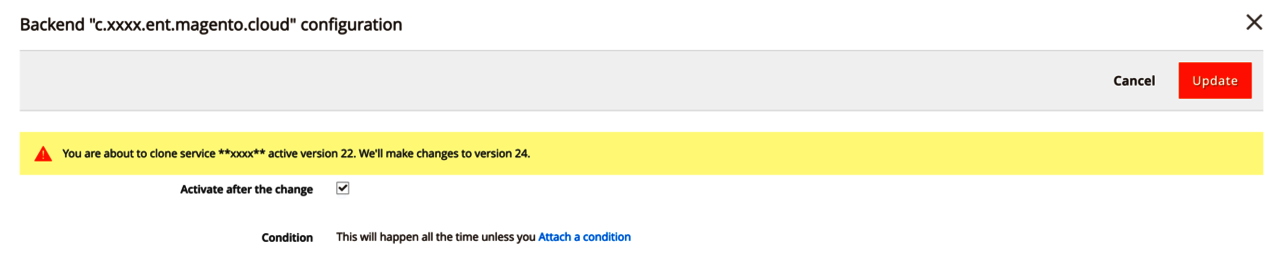
In addition, set up a new condition by clicking “Attach a condition“ then “Create new condition“. Screenshots of what you will see are below.
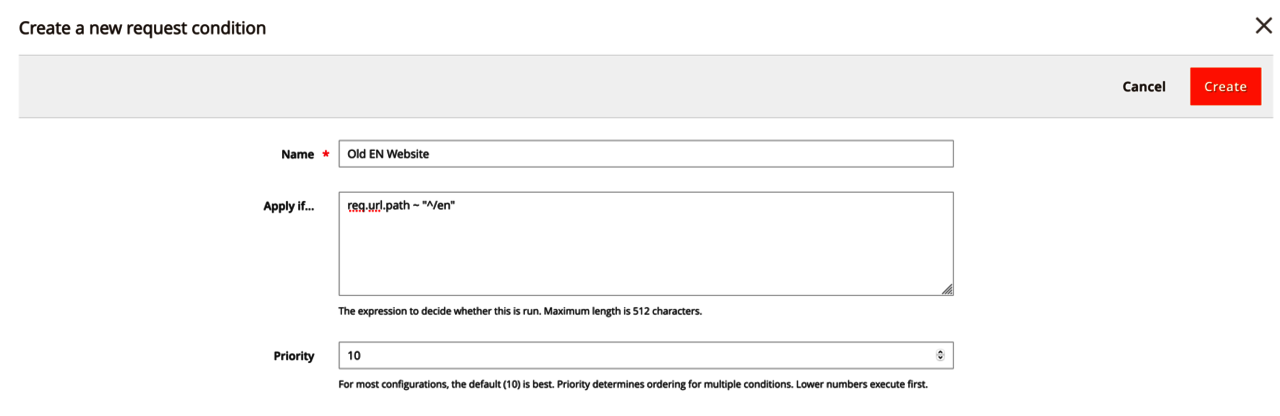
Apply if:
req.url.path ~ "^/en"
Save the condition. I would also recommend that you re-upload VCL (Varnish Configuration Language) to the Fastly and flush the cache afterward. (Even if it is not required, I am always a fan of flushing the cache.)
Now, when Fastly decides which backend system to load content from, it will validate conditions if they exist. In our case, Fastly will detect that request starts from /en prefix and will use another backend system, which it will deliver content from.
Conclusions
Though it’s quite a simple explanation, Fastly provides you with a powerful tool for managing traffic in the many different ways you might need to. Also, it is not only limited to backend configurations you can implement with Magento extensions because you can easily use Fastly API to manage almost everything you need.